

Introducing the Trinnov Amplitude 16 Amplifier
Trinnov Amplitude 16 Unboxing: 16 Channels of Class D Power Just Landed
The Trinnov audio upgrade to the Techthusiasm home theater keeps rolling. The Altitude CI preamp is already in hand — and now the Amplitude 16 has arrived to go right alongside it. 16 channels of Class D amplification, optional Dante board installed, and this thing is going straight into the rack. Let's take a look at how it ships, what's in the box, and the key details you need to know.
📺 Watch the full unboxing on YouTube: Trinnov Amplitude 16 First Look
What Is the Trinnov Amplitude 16?
The Amplitude 16 is Trinnov's 16-channel Class D power amplifier — built to pair directly with the Altitude CI (and the broader Altitude lineup) for a fully integrated, high-performance home theater amplification solution. 200 watts per channel into 8 ohms, measured with all channels driven.
Class D gets a bad reputation in some audiophile circles, but that reputation is outdated. The modules available today deliver clean, high-current power with excellent signal-to-noise performance and significantly lower heat output than Class AB — which means more amplification in less rack space and less thermal stress on your equipment room. This is purpose-built for serious multi-channel home theater, and the implementation here is premium.
For the Techthusiasm theater, this replaces the dual NAD M28s that were previously driving the system. Similar power rating — about 200 watts per channel, also Class D — but the Amplitude 16 brings much more flexibility: Audio-over-IP via Dante, bridging capabilities, and native integration with the Altitude CI platform.
Packaging and What's in the Box
Same philosophy as the Altitude CI — double-boxed, double-taped, maximum protection. Trinnov is clearly not cutting corners on how this gear ships. The Amplitude 16 is a little heavier than the Altitude CI (to be expected given the amplifier hardware inside), but still impressively light for what it is. A Class AB or traditional Class D design at this channel count would be significantly heavier and larger. That's one of the real practical benefits of modern Class D — serious power in a manageable chassis.
The unit comes in a plastic bag rather than the cloth bag included with the Altitude CI. Everything else is clean and organized.
What's Included
Amplitude 16 unit — 3U rack chassis, brushed metal front panel, matching aesthetic to the Altitude CI
Two US power cords — and yes, you need both. The Amplitude 16 has two separate power inlets and draws enough power that they need to be on two separate outlets. Plan your power distribution accordingly.
Rack ears and rack screws — included in the box, no separate purchase needed
User manuals — two languages; most of the real configuration happens through the network interface
The optional Dante board (Audio-over-IP) was added to my order and is factory-installed in the unit. That's an additional cost, but it's fairly nominal relative to the overall price of the Amplitude 16 — and if you're pairing this with an Altitude CI, it's essentially mandatory for the full AoIP signal chain.
Hardware Walkthrough: Front Panel
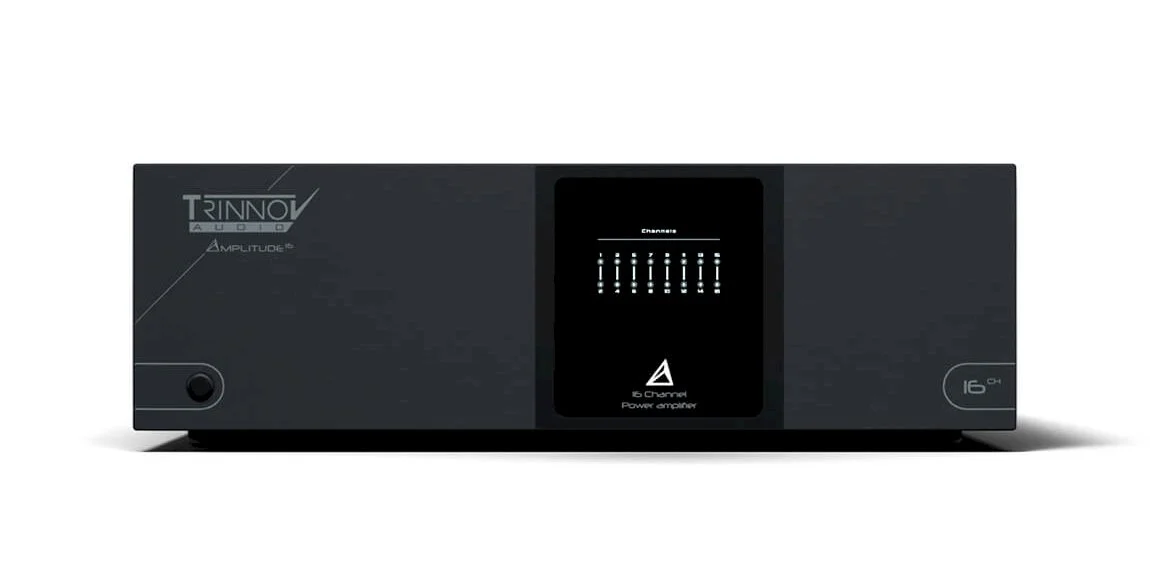
The front panel is clean and functional. Large amp power display with bridging indicators, a simple power button — that's it. No complex interface on the front because the Amplitude 16 is designed to live in a rack or equipment room and be managed via network. The brushed metal finish and overall fit and finish look great right alongside the Altitude CI. These two units were clearly designed to coexist visually as well as functionally.
It's a 3U chassis — a little taller and a little deeper than the Altitude CI, which is 2U. Together they take up 5U of rack space, and that's your entire signal chain from digital processing to speaker output. Compared to my previous setup — NAD M28, NAD M28, Anthem AVM90 — the rack space savings are real and meaningful.
Venting is substantial. Two passive grill vents on one side, active fans on the other — Class D runs cool but 16 channels at 200 watts each still generates heat under load. Plan your rack airflow accordingly.
Hardware Walkthrough: Rear Panel
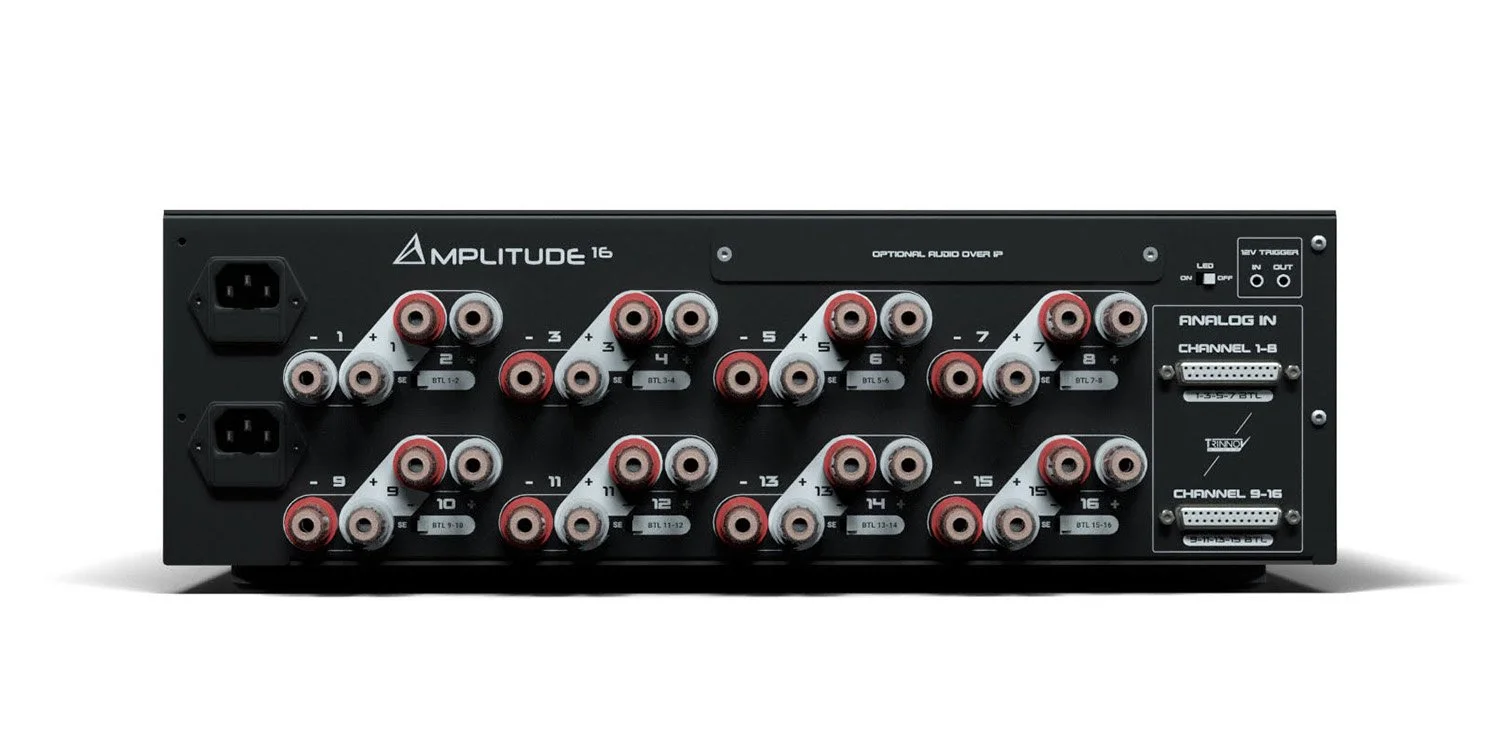
Dual Power Inlets
Far left: both AC power inlets, clearly labeled. Both must be connected. This is a high-draw device and your power distribution planning matters.
Speaker Terminals — 16 Channels with Bridging
All 16 speaker terminals are numbered and clearly laid out, with each group offering both standard stereo and bridged configuration options. Multi-way binding posts that accept bare wire or banana plugs — exactly what you want for a flexible installation.
Bridging is a key feature I'm taking advantage of in the Techthusiasm build. With 11 speakers in the room, I have 5 unused amplifier channels at standard configuration. Bridging pairs two channels into one for higher power delivery — I'm bridging the main left and right channels, the center, and will be bridging the main surround positions as well. The Focal Utopias in the front wall have already been pulled back to single-amp (no longer bi-amped), so bridging the mains just makes sense to maximize headroom there.
One important note on bridging: you have to manage the positive and negative connections correctly — positive terminal from one amp, negative terminal from the other within the bridged pair. Consult the manual before wiring. Get it wrong and you'll have problems. Get it right and you've got a significant power upgrade on your most important channels.
Dante Board (Optional Audio-over-IP)
The installed Dante board occupies its own section on the rear panel with two RJ45 network connections — a primary and a secondary port. This is how the Amplitude 16 connects directly to the Altitude CI's SFP network ports for the Audio-over-IP signal chain.
The connection runs RJ45 on the Amplitude 16 side to an SFP transceiver (with the appropriate copper cable) on the Altitude CI side — the transceiver module included with the Altitude CI handles that interface. The result: a fully digital signal path from the Altitude CI's processing engine to the Amplitude 16's speaker outputs. No analog stage in between. No DB25 breakout cables. Clean, simple, and scalable.
Important compatibility note: the Dante board and the DB25 inputs are mutually exclusive. If the Dante board is installed, do not connect sources to the DB25 ports. The cover plate over the DB25 section when the Dante board is present is the visual cue — if it's covered, use AoIP.
12V Triggers
Both a trigger input and a trigger output are present. Triggers are still required for power management, even when using AoIP.
DB25 Analog Inputs (Covered)
For builds not using the Dante board, DB25 connectors provide the preamp-to-amplifier connection — standard pro audio pin-out, same as the Altitude CI's analog outputs. In my configuration, these are covered and unused since we're running full AoIP.
How It Fits the Techthusiasm Build
Here's the full plan for how the Amplitude 16 slots into the Techthusiasm home theater system:
16 channels total, with 11 speakers driven at standard configuration and bridging applied to the main LCR and primary surround positions
Audio-over-IP via Dante from the Altitude CI — fully digital signal chain, no analog interconnects for speaker channels
Analog outputs from the Altitude CI (via DB25 breakout) handle the five subwoofers — those bypass the Amplitude 16 entirely and connect directly to the sub amplification
Focal Utopia mains returning to single-amp configuration with bridged power delivery
This thing is going to be a step forward from the NADs. Similar rated power, but the Dante integration, the bridging flexibility, and the native Trinnov ecosystem integration make it a fundamentally better fit for this build. The NADs were excellent — the Amplitude 16 is just purpose-built for what this system is becoming.
Key Takeaways
200W per channel into 8 ohms, all channels driven
Class D amplification: clean, efficient, significantly lighter and cooler than Class AB at this channel count
3U rack chassis — 5U total with the Altitude CI, replacing a 3-device setup
Two power inlets, two US power cords included
Rack ears and screws included in the box
Bridging supported on any channel pair — important for maximizing power on critical speaker positions
Optional Dante board (factory-installed) adds Audio-over-IP via two RJ45 ports; mutually exclusive with DB25 inputs
12V trigger input and output for power sequencing and system control integration
Brushed metal front panel, matching aesthetic to the Altitude CI — designed to live together in a rack
What's Next
The Altitude CI and Amplitude 16 are both in hand. Next up: racking everything, making the AoIP connections, configuring the Dante network, running the Trinnov Optimizer calibration, and getting this system running in the room. Subscribe to the Techthusiasm YouTube channel so you don't miss a step of the build — the installation content is coming fast.
If you missed the Altitude CI unboxing, start there — it covers the preamp side of this pairing in full detail including the rear panel AoIP connections, HDMI layout, and more.
Interested in Trinnov for Your Home Theater?
Trinnov, Kaleidescape, SVS, Focal, Perlisten, JVC, Epson, Stewart Filmscreen, madVR — if it's in the Techthusiasm lineup, I can get it to you with the support to back it up. Whether you're spec'ing a new dedicated theater or upgrading an existing system, I'm happy to consult, advise, and make it happen. Get in touch today!